
When working with large volumes of information, you often need a programming language — in my case, it’s R — to collect, prepare, and process data. At first, the desktop version of RStudio and the taskscheduleR package were more than enough for me to automatically run scripts on my personal computer. But over time, the number of scripts increased significantly, and all updates became dependent on whether my computer was turned on.
That’s when I started thinking about installing R on a server. For my needs, I decided to use a Google Cloud Platform (GCP) server.
It’s only fair to mention that when I started looking into how to install R on a Google Cloud Platform server, I came across an article on Netpeak’s blog that described how to do it. However, while following that article, I still ran into a few issues that weren’t mentioned there.
Here’s What We’ll Cover:
Creating a Virtual Machine in Google Cloud Platform
If you decide to create a server in Google Cloud Platform, the first thing you need to do is set up a virtual machine (VM). Google offers a wide variety of configurations, along with a free one-year trial period.
If this is your first time using GCP, you’ll need to create a project and enable billing before you can create a VM instance. Even if you’re using the free trial, you’ll still need to link your bank card. Google promises not to charge it :) It’s only needed to verify that you’re a real person.
Now that we’ve taken care of the formalities, let’s get started.
Go to the VM Instances page in the GCP console and click Create instance.

In the new window, fill in the following parameters:

- Name — Enter the name of the VM (letters, numbers, and dashes allowed).
- Region & Zone — Choose your desired region and zone. This affects available resources and data location.
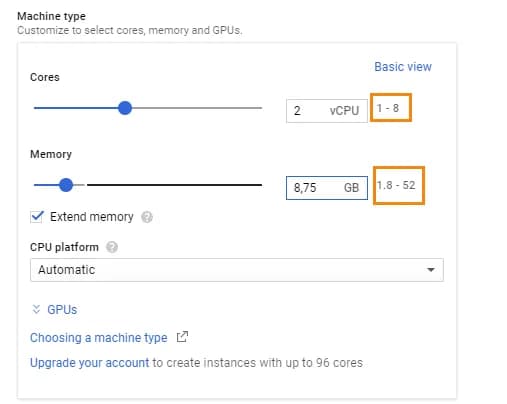
- Machine type — Choose a suitable configuration. In advanced mode, you can select up to 8 CPUs and 52 GB of RAM.
- Boot Disk — Select Ubuntu 16.04 LTS or Ubuntu 18.04 LTS as your OS.
- Identity and API Access — Since we’re not creating apps that use service accounts to access Google Cloud APIs, the default settings are fine. You can read more in the GCP documentation.
- Firewall — Enable both HTTP and HTTPS access to the server.
On the right-hand side, you’ll see an estimated cost for using the VM.
Don’t forget to click Create. After a few moments, your VM will be ready.
Installing R and RStudio on a Google Cloud Platform Server
To work with your newly created VM, you need to connect to it via SSH (Secure Shell). This protocol encrypts all traffic, including passwords. Just click the SSH button in the menu:

A new browser window will open and... Welcome to the Matrix )
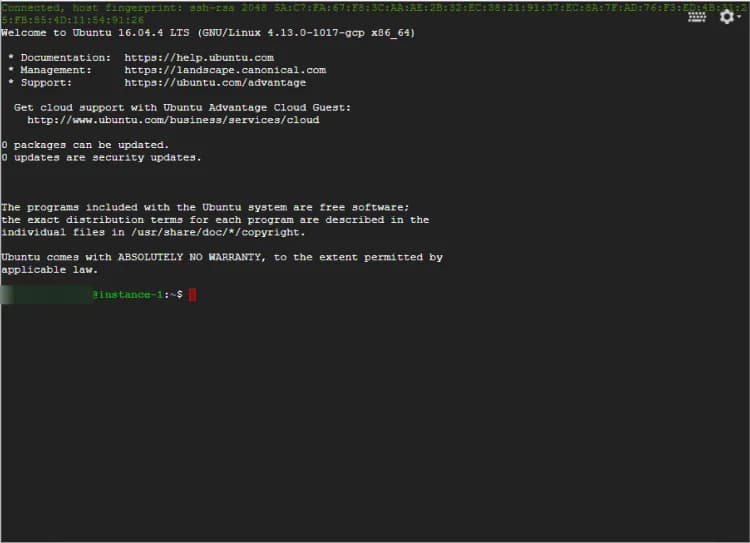
My first thought was, “This is it — the Matrix.” But after talking with some developers and getting a few tips, I realized it’s not so scary. And you’ll see that for yourself soon.
Fun fact: most of the commands we’ll use start with sudo, which allows you to execute commands as the root superuser.
Before we get started, here’s a quick explanation: aside from Ubuntu’s main repository, which contains all the default packages, there are many external repositories, such as the one for R. To add such a third-party repository, follow these 4 steps:
- Add the repository URL to /etc/apt/sources.list
- Add the repository’s public key to the APT keyring
- Update the package cache
- Install the required package
Let’s walk through each step:
Adding the CRAN Repository to /etc/apt/sources.list
We’ll be adding information to the /etc/apt/sources.list file so the system knows where to fetch R packages from. Open the file using the nano text editor (or use vim, if preferred):
sudo nano /etc/apt/sources.listScroll to the bottom of the file and add this line:
deb https://cran.rstudio.com/bin/linux/ubuntu xenial/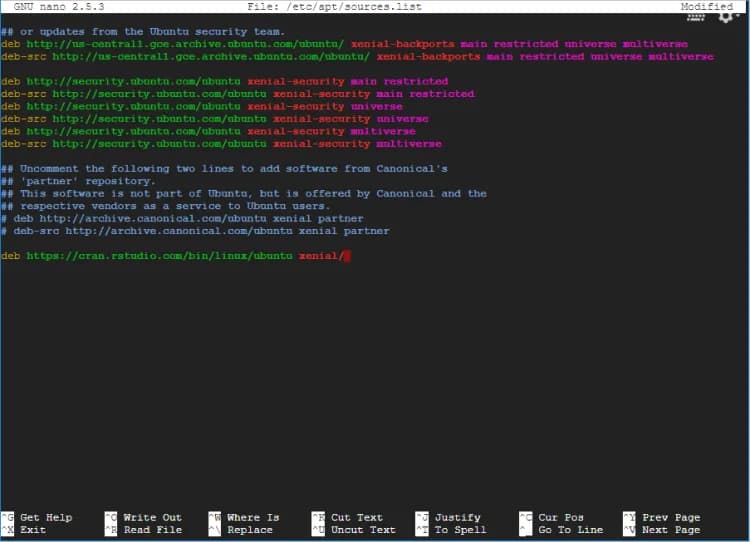
Press Ctrl+X to exit, then press Y to confirm changes:

Finally, hit Enter to save the changes to the same file.

Adding the CRAN Public Key to APT Keyring
The key confirms the repository’s authenticity and security. Add it with:
sudo apt-key adv --keyserver keyserver.ubuntu.com --recv-keys E084DAB9This pulls the key from the Ubuntu key server — keyserver.ubuntu.com
Updating the Package Cache
Run with:
sudo apt updateInstalling R
To install the base R package, run:
sudo apt-get install r-baseYou’ll be prompted to confirm with Y. To skip confirmation, run:
sudo apt-get install r-base -yInstalling RStudio
Let’s also install RStudio Server. First, download the installer: Do this with wget command:
wget https://download2.rstudio.org/rstudio-server-1.0.136-amd64.debTo install RStudio, you also need to install an additional package — gdebi. Gdebi is a tool used for installing .deb packages.
sudo apt-get install gdebi-core -yAnd finally, use the following command to install RStudio from the downloaded file:
sudo gdebi rstudio-server-1.0.136-amd64.debNow you need to specify the port through which you will access RStudio. To do this, add the necessary information to the /etc/rstudio/rserver.conf file using the following command:
sudo nano /etc/rstudio/rserver.confAnd add the following line to the file:
www-port=80Next, set a password to access RStudio:
sudo passwd user_namewhere user_name should be replaced with your actual username.
While typing the password, it may seem like nothing is happening — but rest assured, the characters are being registered. After entering it successfully a second time, you’ll see something like this:

Now all that’s left is to restart the RStudio Server — and you’re ready to get started.
sudo service rstudio-server restartTo access the familiar RStudio interface, go to the external IP address of your server:

Most likely, when you try to log in, you’ll see an error like this:
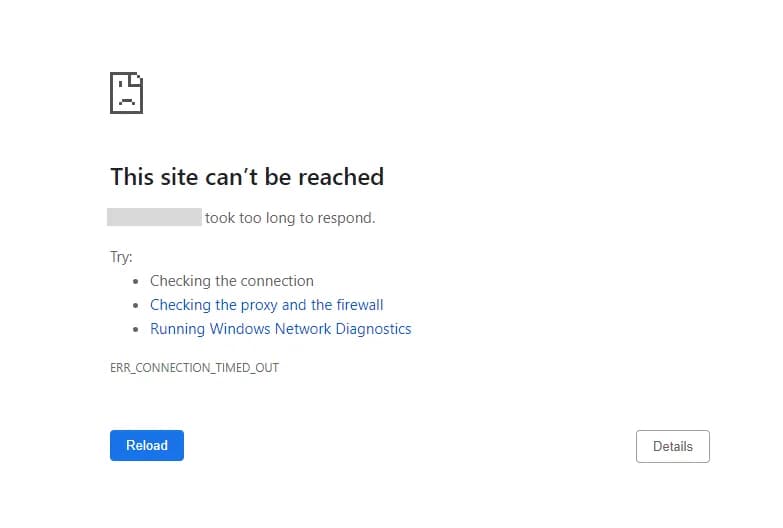
This happens because you’re trying to connect via HTTPS, but we only opened port 80 for HTTP when setting up RStudio. Just remove the extra "s" from the address bar and you’ll be able to connect: https://22.222.222.22/ → http://22.222.222.22/
In the login window that appears, enter your username and password—and enjoy the familiar RStudio interface, now running on your server.

Installing Additional R Packages on the Server
Chances are, the base R packages won’t be enough for your needs, and you’ll have to install additional ones. Let’s walk through the process using the googleAnalyticsR package as an example.
If you simply enter the following command in the R console:
install.packages("googleAnalyticsR")…you’ll most likely encounter an error.

To avoid this, you need to install several additional Ubuntu system packages. You can do this using the following command:
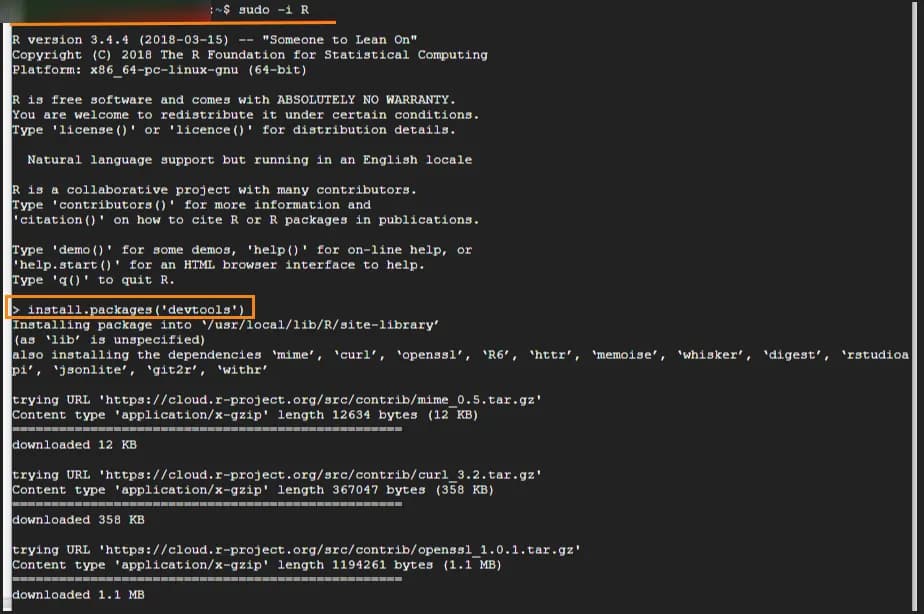
sudo apt-get install build-essential libcurl4-gnutls-dev libxml2-dev libssl-devAfter this quick step, you’ll be able to install packages in RStudio the usual way, or directly from the Ubuntu console. To start the R shell as the root user:
sudo -i RNow you can use install.packages() directly from the Ubuntu terminal.
Setting Up Automatic Script Execution
Now let’s look at the main reason I installed R on a server—automated script execution on a schedule. For this, we’ll use the cronR package. First, install it and load the library:
install.packages("cronR")
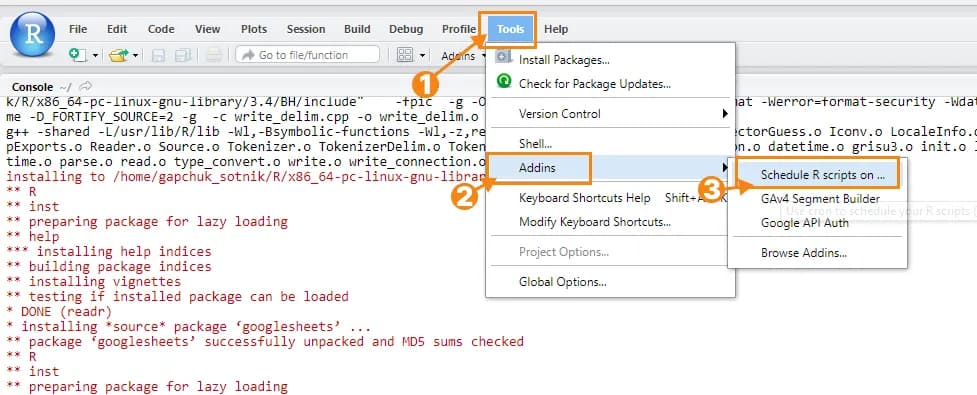
library(cronR)A new add-in tab will now appear, called “Schedule R scripts on...”
When launching it for the first time, you’ll see this window:
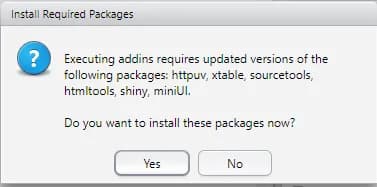
Go ahead and confidently click Yes.
Once all the necessary packages are installed, you’ll see the following window:
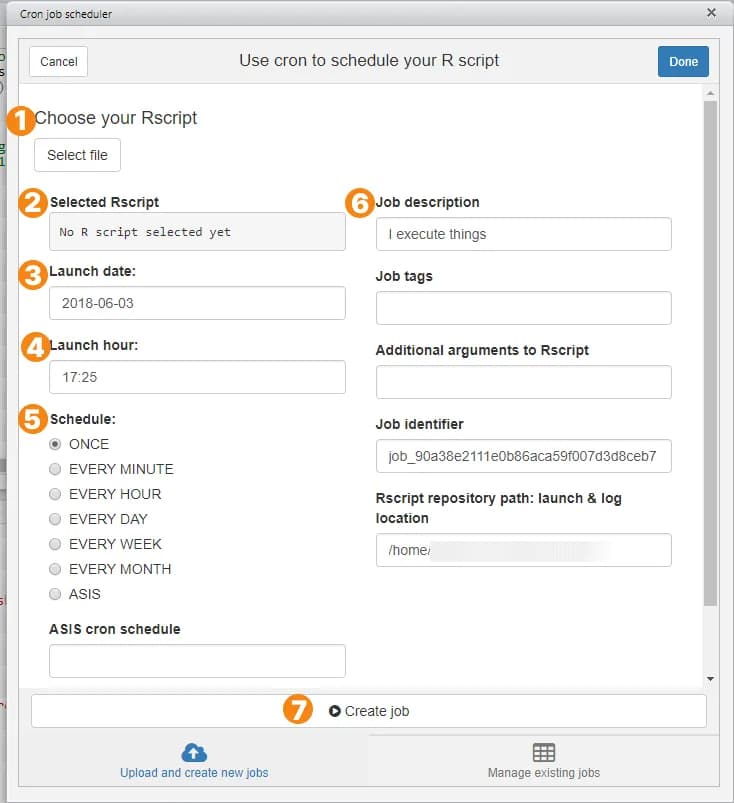
In this window, you need to specify the script and execution parameters:
- Choose your Rscript — select the desired script
- Selected Rscript — displays the script you selected
- Launch date — the date of the first execution
- Launch hour — the time the script should run
- Schedule — the recurrence schedule
- Job description — a brief description of the task
- Create job button — click it when you're done
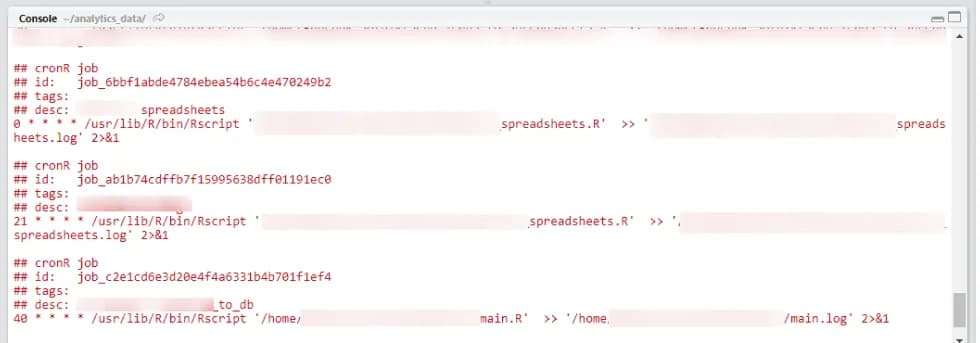
To view all scheduled tasks, go to the Manage existing jobs tab

and click the Show current crontab schedule button.

In the RStudio console, you’ll see a list of scheduled scripts along with their execution times.
That’s it ;)
Final Thoughts: R is an incredibly powerful programming language that’s perfect for tasks involving data collection, preparation, and processing. And by installing R on a server, these capabilities become truly limitless. How do you use R?
If you enjoyed this content, subscribe to my LinkedIn page.
I also run a LinkedIn newsletter with fresh analytics updates every two weeks — here’s the link to join.

Web Analyst, Marketer
Have thoughts or feedback?
Share with others and join the discussion.Loading comments…