
Mon, May 13, 2019
What is Google Tag Manager, Why You Need It, and How to Use It in Your Business — GTM Basics
The original article was written on May 13, 2019, and it focused on sending data to Google Analytics Universal. However, during the migration of the blog to a new CMS, I decided to update the content to reflect the current version — Google Analytics 4.
Google Tag Manager is one of those tools that can make your life simpler, more efficient, and in some cases, even bring in extra profit.
"Why are you still struggling with tracking codes, writing massive specs, and waiting for your developer to implement them? Just use Google Tag Manager and make your life easier!" — This is something many marketers have heard before finally adopting this tool for their business needs.
Sounds familiar? You need to add a tracking code to the website, so you write a task for the developer... and then wait... and wait... and wait?

If yes — this article is for you ;)
Google Tag Manager (also known as GTM) is a convenient — and most importantly, free — tag management system that allows you to add various useful code snippets directly to your site. GTM includes dozens of pre-configured tag templates that don’t require any custom coding. Below, we’ll cover the GTM basics:
Why use Google Tag Manager
One major reason to use it is that you no longer have to depend on a developer (who often isn't even yours but outsourced) to install the necessary codes on your site. With GTM, you can do it yourself without deep technical knowledge. In other words, once the GTM script is on your website, you can quickly install other Google tags (like Google Tag for GA4) or third-party scripts/pixels (e.g., Facebook Pixel) with just a few clicks.
This is especially useful if you like testing and exploring new ways to improve conversion on your site. For example, if you're curious about how users interact with your site, you can install Hotjar through GTM — without involving a developer.
Other benefits include faster site loading, more accurate analytics, and much more.
Creating a Google Tag Manager Account
It only takes a few simple steps:
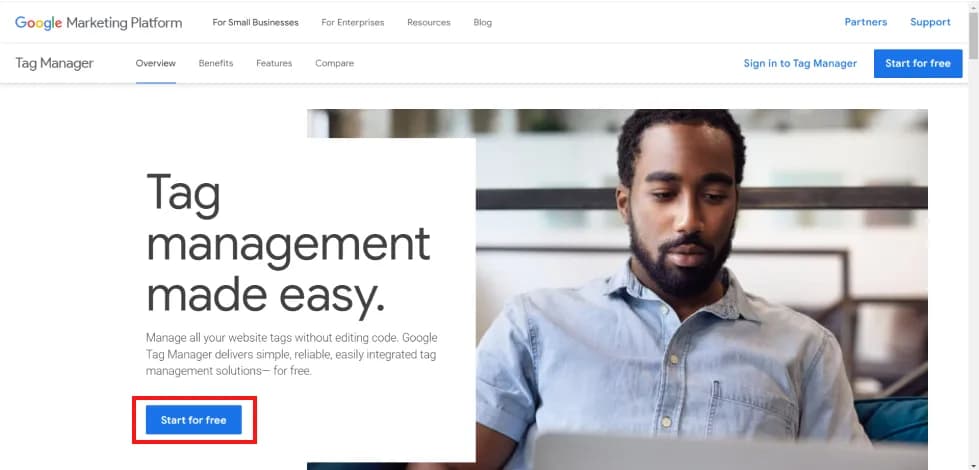
- Go to the official Google Tag Manager site and click "Start for free";
- Log into your Google account (or create one if you don’t have it);
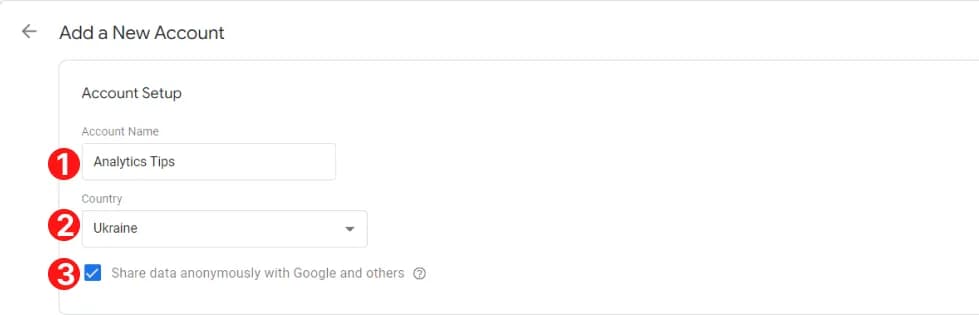
- Enter your account details:
- Account Name: Usually your company name
- Country: Where your company operates
- Check or uncheck data sharing preferences based on your comfort level
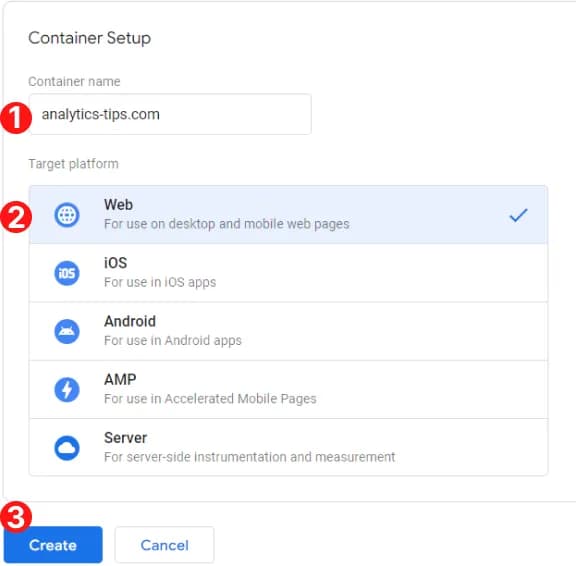
- Fill in the data to create a container:
- Enter the name of the resource for which you’re registering the account. Most often, it’s your website’s address;
- Select where the container will be used. Usually, tag managers are used for websites and AMP pages;
- And don’t forget to click the Create button.
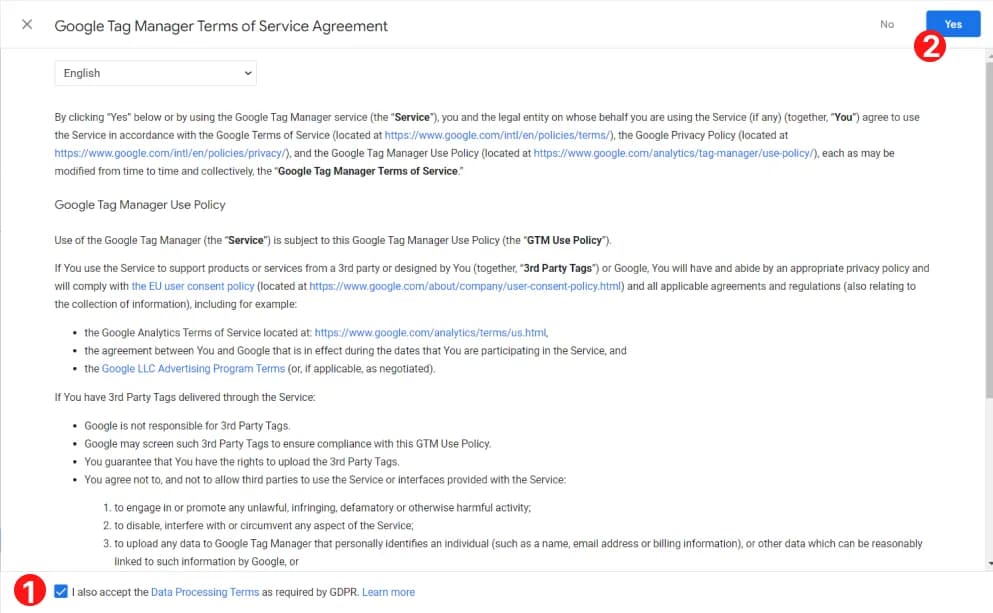
- All that’s left is to accept the Terms of Service agreement and you can start installing it on the website.
Installing the tag manager on the website
Before starting to work with Google Tag Manager, you need to install it on your website. There are several options here:
- Do it yourself. The fastest way, but requires some programming skills;
- Use various CMS plugins for your website to install GTM – Doesn’t require programming skills, but you’ll need to spend time finding the right plugin. Plus, there’s always a chance that with this method the code won’t fire on all pages of the website, or other errors will occur. Most often, this is NOT the optimal, though the simplest method;
- Write a tech spec for the developer and wait for implementation. Why not use their help one last time? :) This is the most optimal method, and it takes very little time for both you and the developer.
Writing a tech spec for the developer
In the end, when you created the container, you should have seen the following window:
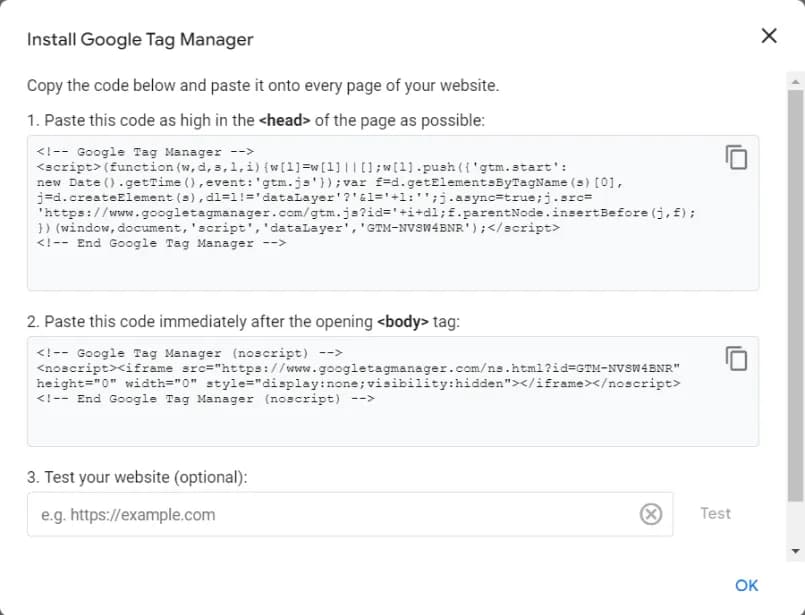
This window describes everything your developer needs to do to install it. Simply copy the information from this window into a file and send it for implementation.
If you accidentally closed this window, you can find the instructions by clicking on the container ID at the top of the menu.

Checking correct installation of GTM on the website
Of course, writing the tech spec is only half the job. You need to make sure the codes are installed correctly. Here, like in The Matrix, you have two options:
- Go to the site’s source code and see whether one part is installed in
<head>and the other in<body>, as described in the tech spec for the developer:
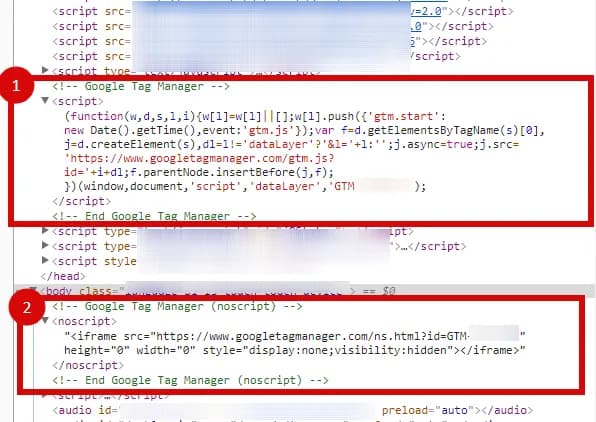
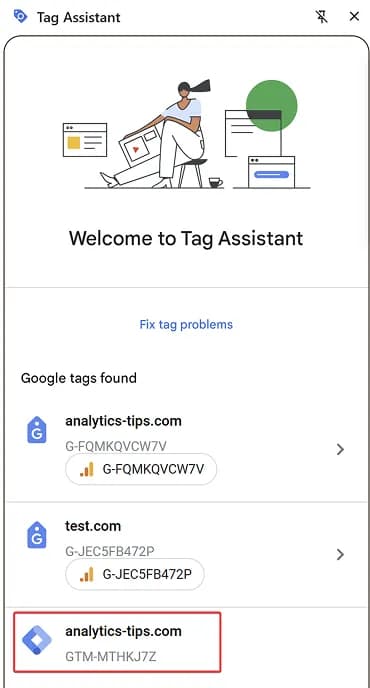
- Use the Google Tag Assistant extension. This allows you to see all Google tracking codes installed on the website. For example, in the screenshot below, we see GTM with ID GTM-MTHKJ7Z is installed.
Now that GTM is installed on our site, it’s time to get acquainted with the main entities we’ll be working with.
Since we’re studying a tag management tool, it makes sense to start our introduction with this entity.
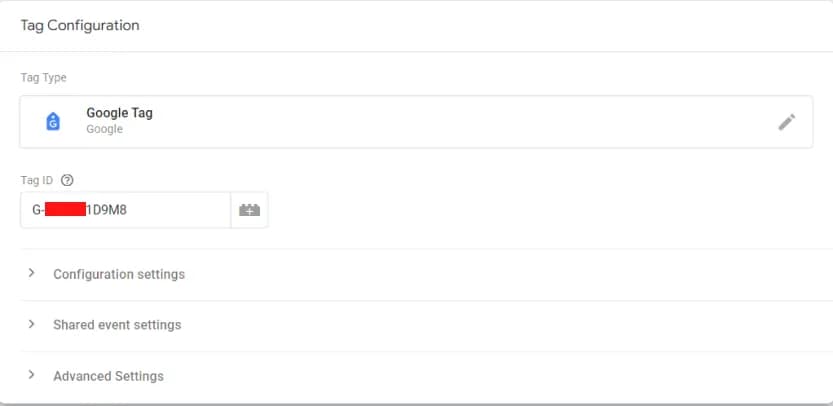
A tag is a piece of code that you place on your website. You can use built-in templates to configure tags (e.g., for Google Analytics 4 or Hotjar), or take a more custom approach with Custom HTML or Custom Image tags.

In other words, if you want to add some tracking code to your site, you need to create a tag with specific settings. For example, to install the Google Analytics 4 code using GTM, you need to create the following tag:
You can read more about tags in the article “Tags in Google Tag Manager. A guide for beginners and beyond.”
Working with triggers in GTM
When creating a tag, besides the tag configuration block, there’s also a second block called triggers.
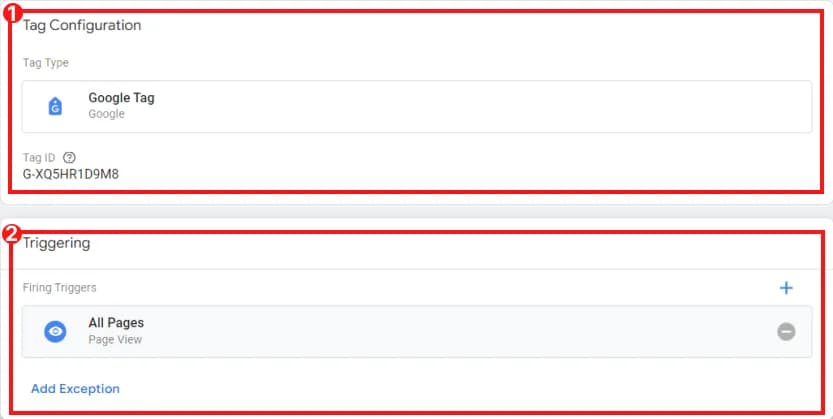
A trigger is a condition for when a tag (code snippet) should fire. For example, if we want to install the Google Analytics code, then according to the instructions it should be placed on every page of our site. So we’ll use the All Pages trigger.
In other words, if we want to implement some tracking code on the website, we must perform just two steps:
- Add the code snippet – a tag with the right configuration for sending data;
- Specify the condition for when this code should fire – a trigger with the appropriate settings.
Each of these points deserves attention, because you don’t want the form submission event to trigger on every page load, right?
And there’s another entity that you can live without, but which makes work much easier — the Variable.
Variables in Google Tag Manager
To simplify, a variable can be imagined as a key-value pair. The key is the variable name. While working with GTM, you’ll find two types of variables: built-in and user-defined.
Built-in variables
As the name suggests, built-in variables exist in the tag manager by default. An example is the Page URL variable, which stores the URL of the current page.

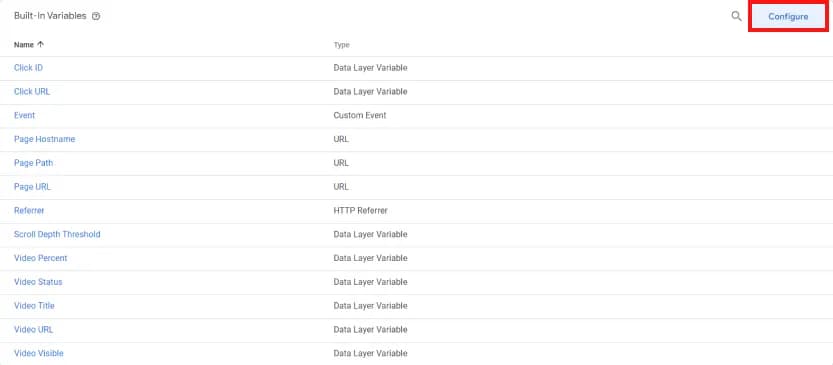
Built-in variables can be further divided into two categories: enabled by default and those you need to enable manually. To access the latter, click the Configure button in the upper right corner:
And check the boxes next to the variables you want to enable:
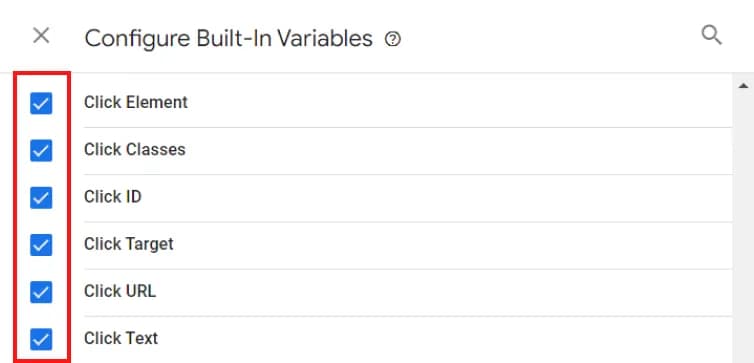
Built-in variables mainly store technical details about the action performed. For example, during a click event, the Click Classes variable will store the class of the button clicked; Click Text will store the text on that button.
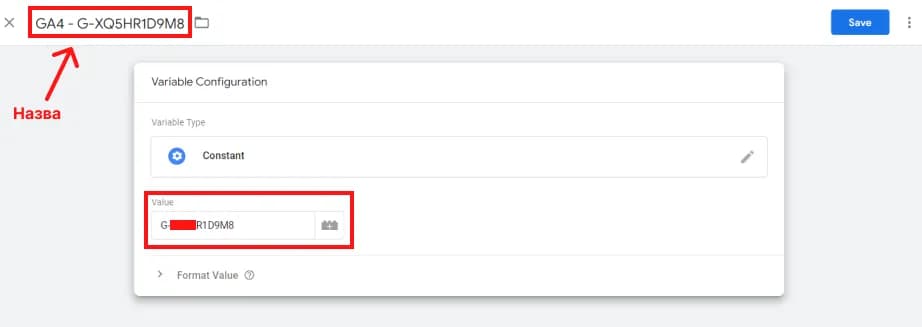
User-defined variables
If the built-in variable info isn’t enough and you want to store some custom data, you can create a user-defined variable. For instance, we might have a variable called “GA4 – G-XXXXXXXXXX” where we store the Google Analytics 4 ID with the value G-XXXXXXXXXX. In this case, we won’t have to go back to our GA4 account each time to find the ID.
Instead of Conclusion
Of course, it’s difficult to explain all even the basic concepts of the tag manager in a single article. So if you want to continue learning about this topic and how to track different user actions on your site using GTM, I recommend checking out the following articles from this blog:
- Tracking scroll depth with Google Tag Manager: Advanced guide
- Tracking video interactions using Google Tag Manager
- Tracking clicks on website elements using Google Tag Manager: Advanced guide
- Tracking link clicks using Google Tag Manager: Practical guide with examples
- Tracking form submissions using GTM’s basic trigger
- Tracking form submissions using the Element Visibility trigger
If you enjoyed this content, subscribe to my LinkedIn page.
I also run a LinkedIn newsletter with fresh analytics updates every two weeks — here’s the link to join.

Web Analyst, Marketer
Have thoughts or feedback?
Share with others and join the discussion.Loading comments…