
Even working with such an amazing tool as Google Tag Manager can sometimes become a routine you want to get rid of. Especially during those moments when you’re setting up the same tags for the hundredth time across different containers and accounts. Yes, of course, there’s the container import/export feature, which lets you quickly load the necessary settings — but for that, you have to store them somewhere so they’re always on hand. That’s when you start thinking — why not delegate this task to some automation or cloud service?
If you’ve had that thought — rejoice: GTM Tools by Simo Ahava is exactly what you need.
So, what can this tool do?
Creating a library of Google Tag Manager setup templates with GTM Tools
To start using the tool, go to the GTM Tools website. In the window that opens, choose the appropriate Google account.

And click the Continue button.

Next, select the account and container that will serve as the basis for the template.

In the next step, you’ll see all available actions that can be performed using GTM Tools. To create a template library, we need the Inspect option. We’ll cover the rest of the options below.

Select the desired container version (usually the latest), and below you’ll see all the tags, triggers, and variables in that version.

Besides the element names, the list also has two additional columns: Cart Action and Links.

The first lets you add the desired elements to the cart for template creation. The second shows dependencies between elements. For example, for the Scrolling tag in my case, the dependencies look like this:

To make the template work correctly, you need to add both the tag and all dependent elements. This is done by clicking the appropriate buttons in the Cart Action and Action fields.
After that, go to the cart, where all the selected elements are already waiting for you.

To create a template based on them, click Save Cart. In the window that opens, enter a name and description, then click Save.

All created templates can be found in the Library section.

Now that we’ve learned how to create templates — let’s upload them into the necessary container.
Cloning and uploading tags, triggers, and variables using GTM Tools
GTM Tools allows you to upload the required settings to a new account in two ways:
- From the template library
- By cloning elements from existing accounts
Let’s go through both options below.
Uploading tags, triggers, and variables from the template library
Select the desired template and click the Clone button.

In the window that opens, choose the account, container, and workspace, then start the cloning process.

If everything went successfully, you’ll see a green message saying Process complete.

That’s it. In just a few seconds, the template is uploaded. Plus, all your templates are always at your fingertips and tied to your Google account. Isn’t that great? :)
If you haven’t created any templates yet, but you know that one of your accounts already has the needed settings — the second option is for you.
Cloning elements from existing Google Tag Manager accounts
Similar to creating a template, you need to add the required elements to the cart, but in the final step, instead of clicking Save Cart, click Clone to container. The rest of the steps are identical to the previous scenario.
Don’t forget to change your Google Analytics ID and publish the changes in the GTM interface.
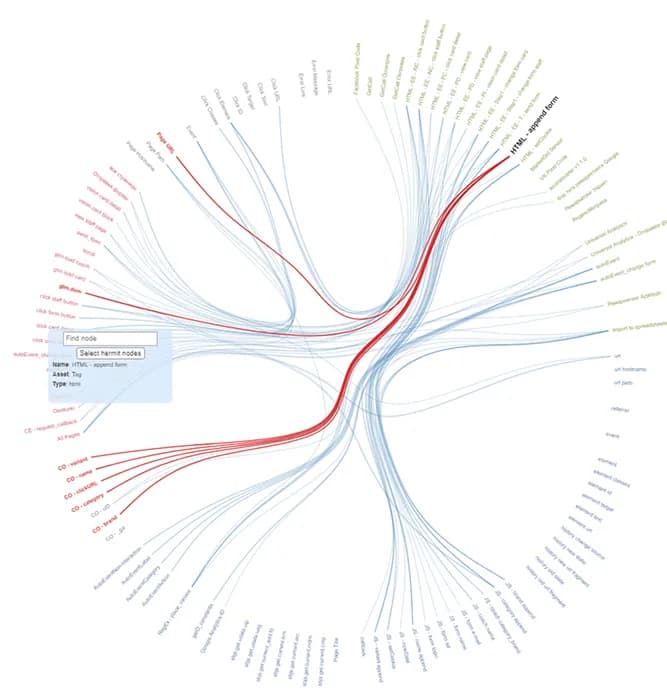
Visualizing the Google Tag Manager container in GTM Tools
And finally (but no less importantly), one more function of GTM Tools worth mentioning — container visualization. This option lets you clearly see all the relationships between elements inside the GTM container.
If you enjoyed this content, subscribe to my LinkedIn page.
I also run a LinkedIn newsletter with fresh analytics updates every two weeks — here’s the link to join.

Web Analyst, Marketer
Have thoughts or feedback?
Share with others and join the discussion.Loading comments…