
Thu, May 16, 2019
Setting Up Main Analytics Systems Using Google Tag Manager: Google Analytics 4, Facebook Pixel, Hotjar
The original article was written on May 16, 2019, and it focused on sending data to Google Analytics Universal. However, during the migration of the blog to a new CMS, I decided to update the content to reflect the current version — Google Analytics 4.
The main reason why Google Tag Manager is installed on a website is to set up analytics systems without needing a developer's help. In this article, we’ll look at how to install three core analytics systems on your website: Google Analytics, Facebook Pixel, and Hotjar.
- Installing Google Analytics 4 via Google Tag Manager
- Installing Facebook Pixel via GTM
- Installing Hotjar
Before we begin, it’s important to note that all the above-mentioned analytics systems, as well as other services, are installed following the same basic scenario:
- Create the appropriate tag (each system has a different one);
- Add a trigger, usually All Pages;
- Publish the changes as a new version.
Since this process is the same for all cases, I'll describe it here.
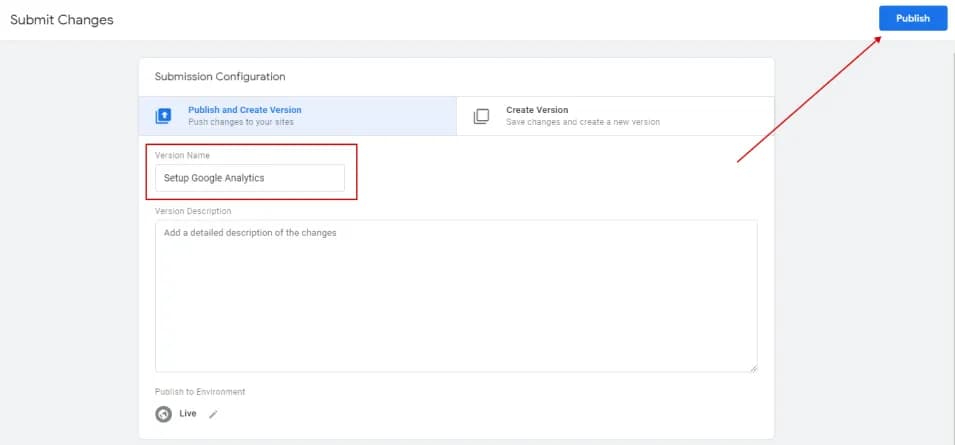
After making the necessary changes and verifying their correctness using debug mode, you’ll need to publish the changes as a new version. You can either publish each tag separately or group several tags into one version. To publish, click the Submit button at the top right:

Don’t forget to specify a version name that will help you remember which settings you published:
Installing Google Analytics 4 via Google Tag Manager
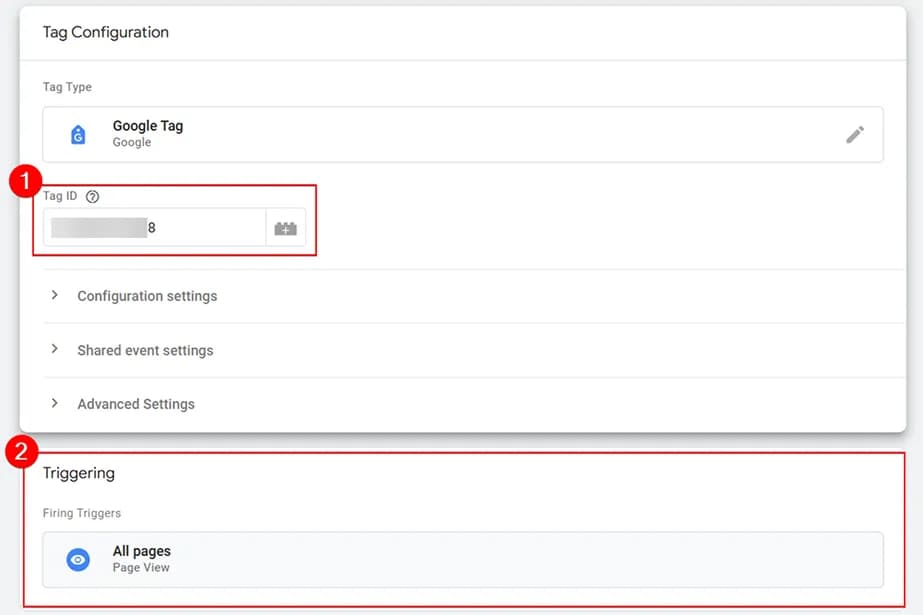
It’s fairly simple. Create a Google Tag type tag with the following settings:
- In the Measurement ID field, enter your Google Analytics 4 stream ID;
- Add the All Pages trigger.
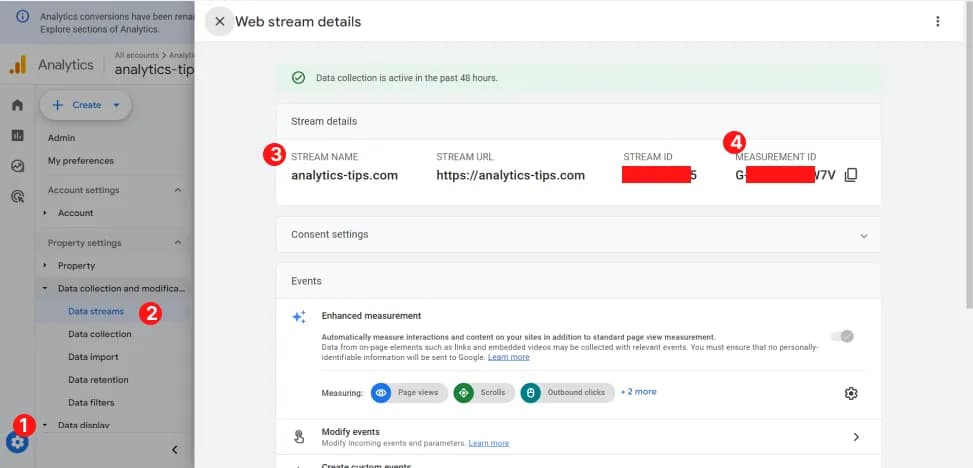
You can find the Google Analytics 4 Measurement ID under Admin > Data Streams > Data collection and modification > Data Streams > Measurement ID:
And that’s it. Don’t forget to publish the container.
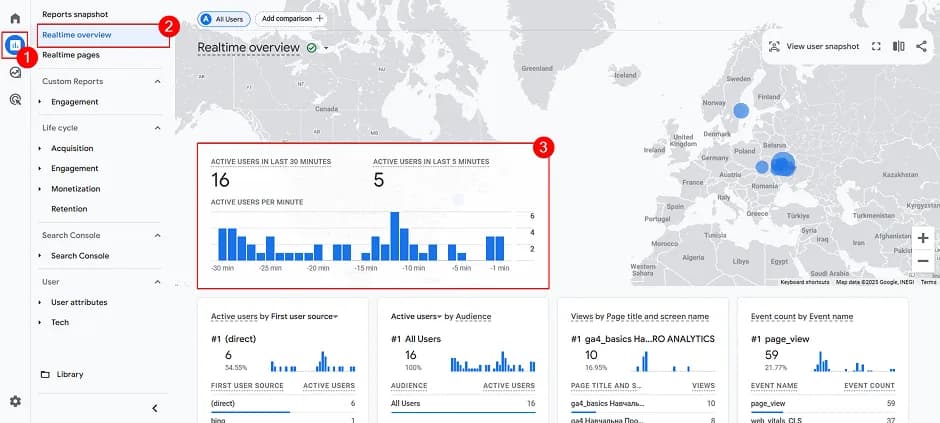
To make sure everything was set up correctly, open your website and go to the Realtime reports section in Google Analytics 4. You should see at least one active user there:
Of course, after installing the code, you’ll need to configure GA4 itself. You can learn how to do that by reading the article Step-by-Step Guide to Setting Up Google Analytics 4 (GA4).
Installing Facebook Pixel via GTM
Setting up Facebook Pixel is even easier. Just make sure to copy your Facebook Pixel code before you start.
Create a tag with the following settings:
- Tag Type: Custom HTML;
- In the HTML field, paste the copied Pixel code;
- Trigger: All Pages.
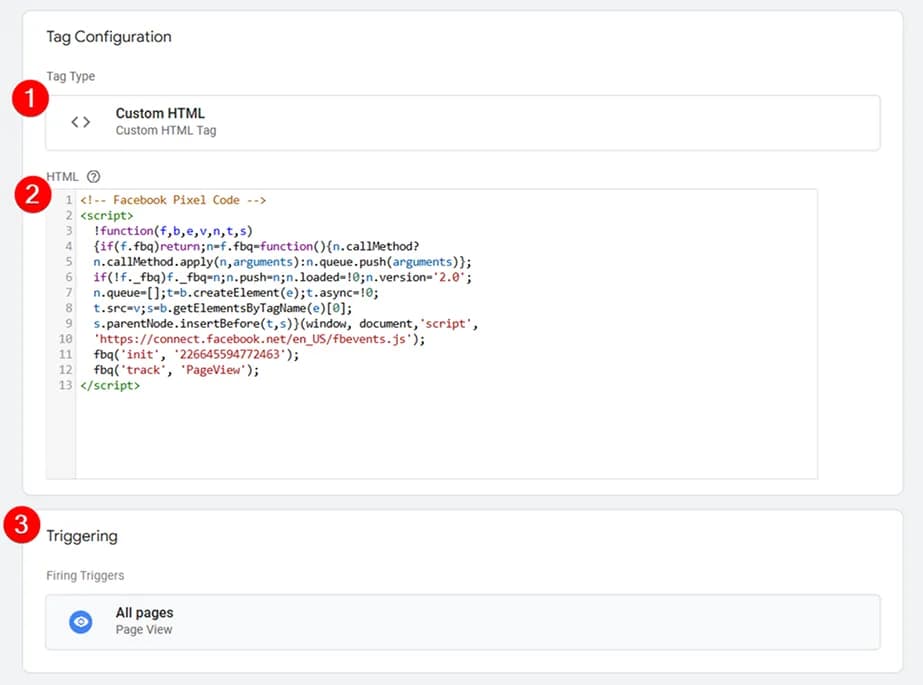
That's it — only three steps, and don’t forget to publish the changes.
You can also use an alternative method by selecting a tag template from the community gallery, as I described here. The steps will be almost identical, except you’ll only need to insert the Pixel ID instead of the full code.
Installing Hotjar via Google Tag Manager
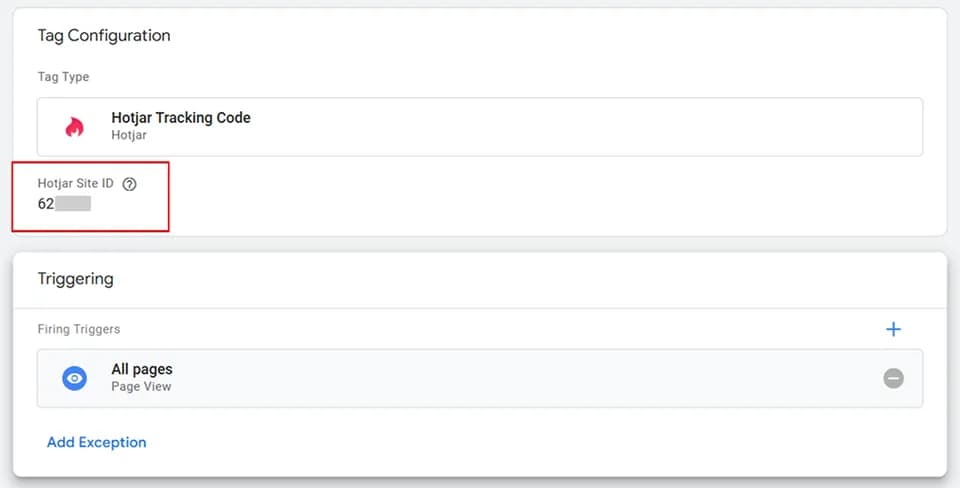
Setting up the Hotjar tag also takes just three steps:
- Select the Hotjar Tracking Code tag type;
- In the Hotjar Site ID field, enter the required ID. You can find it on the Tracking Code tab:

Add the All Pages trigger.
Instead of Conclusion
Installing basic analytics codes is just the beginning. In upcoming articles, you’ll learn how to collect additional data by sending events:
- Tracking clicks on website elements using Google Tag Manager: Advanced Guide
- Tracking link clicks using Google Tag Manager: Practical Guide with Examples
- Tracking form submissions using GTM’s basic trigger
- Tracking form submissions using the Element Visibility trigger
If you enjoyed this content, subscribe to my LinkedIn page.
I also run a LinkedIn newsletter with fresh analytics updates every two weeks — here’s the link to join.

Web Analyst, Marketer
Have thoughts or feedback?
Share with others and join the discussion.Loading comments…