
The original article was written on May 31, 2019, and it focused on sending data to Google Analytics Universal. However, during the migration of the blog to a new CMS, I decided to update the content to reflect the current version — Google Analytics 4.
Google Tag Manager allows you to track a huge number of events occurring on the page using standard triggers, but in some cases, they’re not enough. That’s when sending custom events and using the corresponding trigger comes to the rescue. With custom events, you can track any user action — from adding a product to the cart to pressing a specific keyboard button.
Before we start: how built-in Triggers work.
The following explanation describes only one small aspect of how triggers work. In reality, trigger logic is more complex. But this section will help you better understand how the Custom Event trigger functions.
Each trigger listens for a specific event being pushed to the dataLayer. If you’ve ever debugged tag settings, you’ve probably seen this kind of information in the GTM debugger:
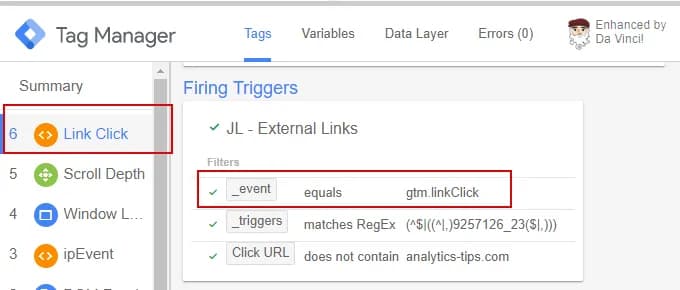
При цьому кожен тригер очікує на якусь свою подію. Наприклад:
- DOM Ready listens for the gtm.dom event;
- Element Visibility - gtm.elementVisibility event;
- Just Links - gtm.linkClick.
Since every built-in trigger is tied to a specific event, for anything else, we use the Custom Event trigger.
How the Custom Event Trigger Works
Setting up a Custom Event trigger is one of the easiest tasks in Google Tag Manager. A Custom Event trigger reacts to objects pushed into the dataLayer that contain the event key.
For example, the following push to dataLayer is all you need for a Custom Event trigger named send_form to fire:
dataLayer.push({
  event: 'send_form'
});
So all you need to do is enter the name of the custom event (i.e., the value of the event key) in the appropriate field and name the trigger.

The only option in this trigger setup is the ability to use a regular expression to match multiple custom event names.

Of course, you can also configure This trigger fires on to limit activation to certain conditions.
Sending Custom Event Data to the Data Layer
Now that we know how to create a trigger for a custom event, we need to send the event in the first place. You can do this in one of two ways: write a brief for a developer to send the data to dataLayer or end the data yourself using GTM's Custom HTML tag. Below, I’ll explain both approaches.
Regardless of which route you choose, I recommend reading the basics of how the dataLayer and data layer variables work first.
Writing a Brief for the Developer
To send a custom event to the data layer, use the following code snippet:
<script>
  window.dataLayer = window.dataLayer || [];
  window.dataLayer.push({ event: 'YOUR_CUSTOM_EVENT_NAME' });
</script>
Replace YOUR_CUSTOM_EVENT_NAME with the name of your event. You define the moment the data should be sent — and include that in your brief to the developer. For example: send this event when a form is successfully submitted.
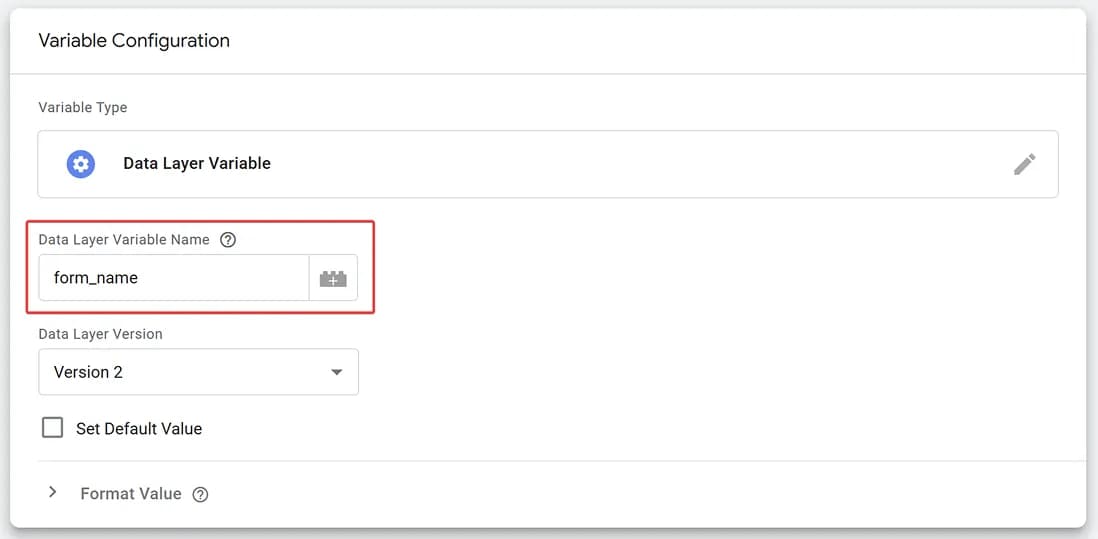
If needed, you can also pass additional parameters with your events. For example, here’s how you can send a form submission event with the form name:
<script>
  window.dataLayer = window.dataLayer || [];
  window.dataLayer.push({
    event: 'form_submit_success',
    form_name: 'contact_form'
  });
</script>
To extract the value of an additional parameter like form_name, you can use a Data Layer Variable. Just enter the parameter name in the appropriate field:
Sending the Event Yourself with a Custom HTML Tag
If you want to send event data into the dataLayer directly via GTM, the best way to do that is with a Custom HTML tag. The code snippet is essentially the same as above. Just don’t forget to set the correct trigger.
Most custom setups for tracking various user actions rely exactly on this method of pushing data to the dataLayer.
For example, here’s how to send a form_change event when a user changes the value in a form:

Here’s the code used in the tag. Make sure to insert your actual CSS selector for the form or input field instead of YOUR_SELECTOR. Also, set an appropriate trigger, like DOM Ready:
<script>
  (function() {
    var formSelector = 'YOUR_SELECTOR';
    var form = document.querySelector(formSelector);

    if (form) {
      form.addEventListener('change', function() {
        window.dataLayer = window.dataLayer || [];
        dataLayer.push({
          event: 'form_change'
        });
      });
    }
  })();
</script>
More examples like this are available here: tracking data entry in form fields or tracking scroll depth and time on the active tab.
Instead of Conclusion
The Custom Event trigger is one of the key tools for advanced tracking in GTM. It enables you to implement anything that standard triggers can’t cover. Many custom setups — from form validation to complex UI interaction scenarios — rely on it.
If you want to use Google Tag Manager to its full potential, you must understand how to send events to the dataLayer and how the Custom Event trigger works.
And don’t forget: clear and meaningful event names make working with data much easier.
If you enjoyed this content, subscribe to my LinkedIn page.
I also run a LinkedIn newsletter with fresh analytics updates every two weeks — here’s the link to join.

Web Analyst, Marketer
Have thoughts or feedback?
Share with others and join the discussion.Loading comments…